 RaveMaker
Overview
BlueStacks App Player for Windows is a great Android emulator that supports most of the common games on Google Play. In this tutorial I will give you a few tips how to optimize BlueStacks App Player for Windows.
Download and Install BlueStacks App Player
- Go to http://www.bluestacks.com/ and download BlueStacks App Player
- Open BlueStacks App Player and register your GMail Account details
- Close BlueStacks
Adjust BlueStacks RAM (Memory)
BlueStacks App Player comes with a default of 768MB RAM.
- Open ‘regedit’: Start->Run->regedit
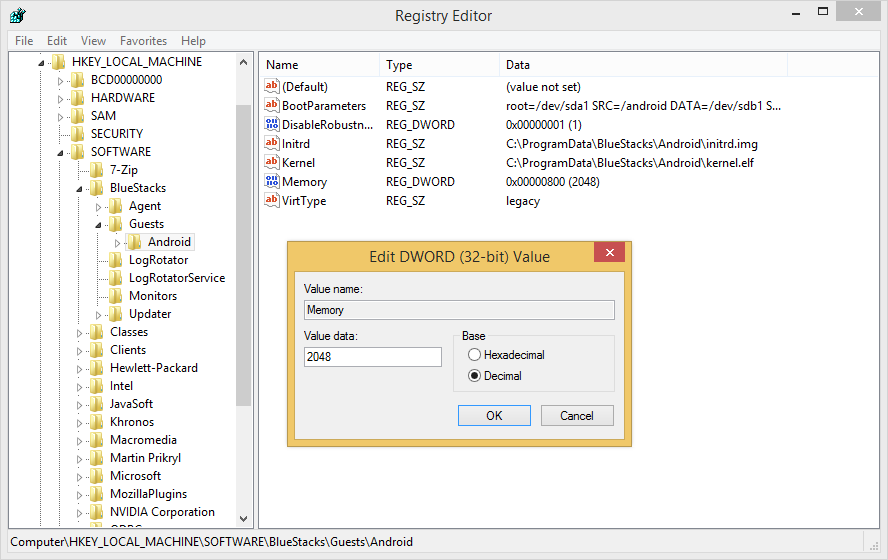
- Navigate to: ‘HKEY_LOCAL_MACHINE/SOFTWARE/BlueStacks/Guests/Android’
- Double click the value ‘Memory’
- Change Base to Decimal
- Input your desired RAM amount DO NOT USE MORE THEN HALF OF YOUR PHYSICAL RAM!! For example: If you have 4GB of RAM input 2GB: ‘2048’
Flickering Issue with NVidia Display Adapter
Sometimes with NVidia GPUs there is an issue that causes the screen to flicker. CHANGE THIS ONLY IF YOUR BLUESTACKS APP IS FLICKERING!!
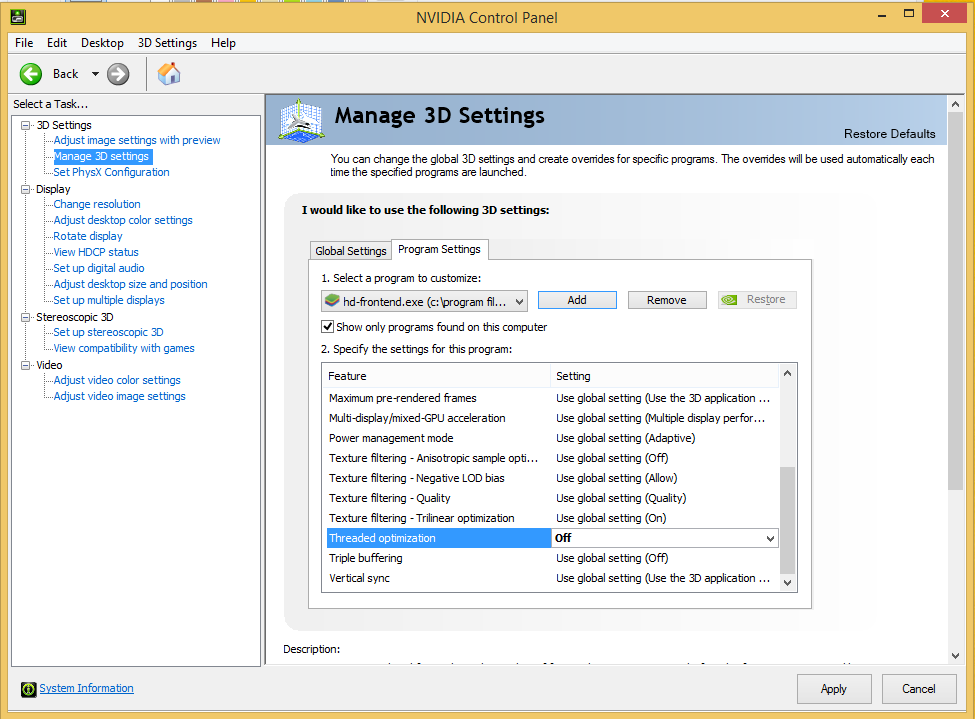
- Open NVidia Control Panel and navigate to ‘Manage 3D Settings’
- Select tab ‘Program Settings’
- Click Add and Select ‘BlueStacks Frontend’
- Scroll down to ‘Threaded optimization’ and change it to ‘Off’
BlueStacks Process priority
Increase BlueStacks Process priorities in Task Manager:
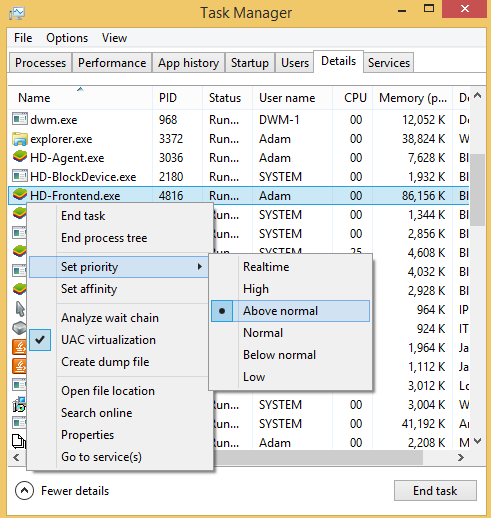
- Open Task Manager and go to Details tab
- Right-Click ‘HD-Frontend’ and change priority to Above-Normal
Enjoy!!