Contents
Overview
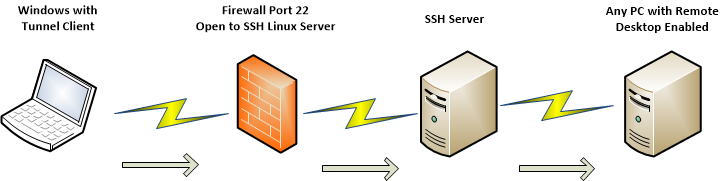
Connecting to a SSH server as a gateway and not directly to a Remote Desktop PC is a safer way to connect and add another layer of encryption without losing performance,
this way you can connect to any client behind a firewall as long as you have port 22 open to your SSH server.
Using Windows Remote Desktop over SSH connection is a very simple task to perform using PuTTY.
Download and Install
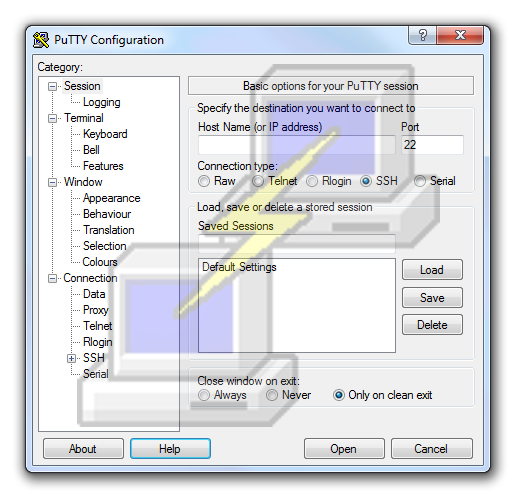
- Download and run the PuTTY.exe file: PuTTY
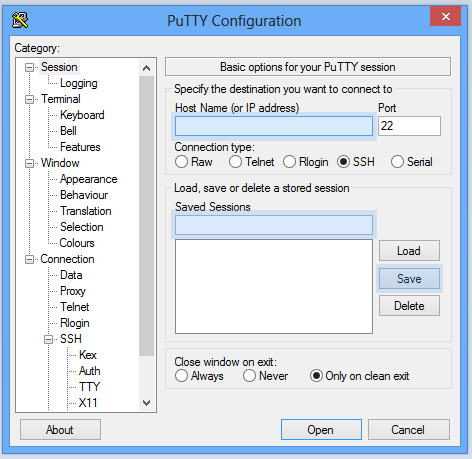
Configure Hostname
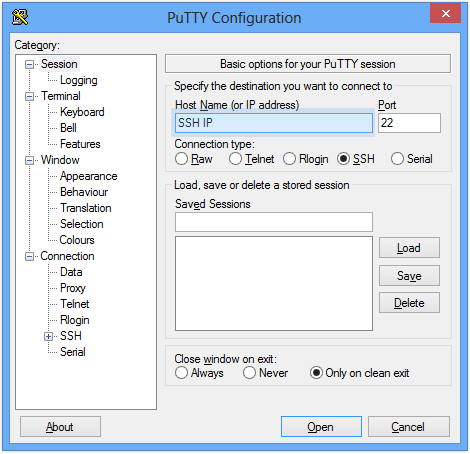
- Input a Hostname or IP address for the server (and a port if different from default 22):
Category–>Session
Set “Host Name (or IP address)” to whatever you need
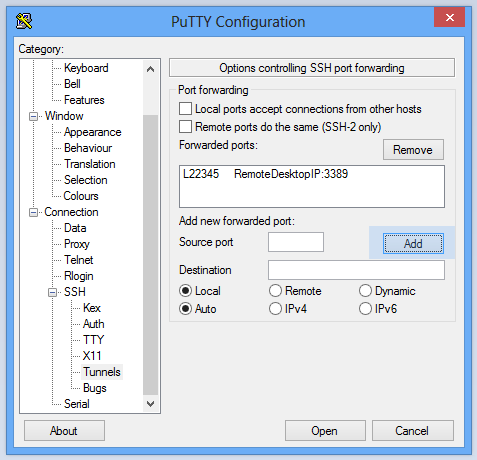
Configure Tunnel
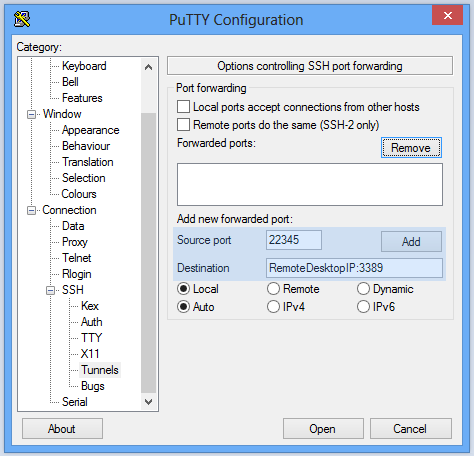
- Now we can configure the Tunnel over the SSH connection by selecting a local port and setting the remote destination:
Category–>SSH–>Tunnels
Set “Source Port” to a random Source port (make sure it is not being used)
Set “Destination” to Remote Desktop IP Address or Hostname and add “:3389” at the end for the default Remote Desktop port - Don’t forget to click Add!
Enable SSH Compression
- You can enable compression for the SSH connection:
Category–>SSH
Mark “Enable compression”

Save Settings
- Don’t forget to save your settings:
Category–>Session
Input Session Name under “Saved Sessions” and Click Save
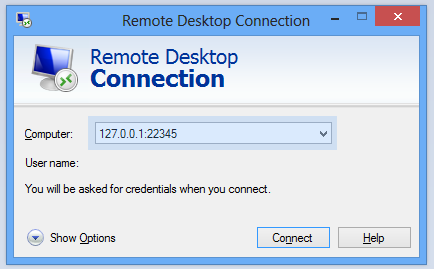
Remote Desktop Client
- Start Remote Desktop Client on windows (Run mstsc.exe):
Input 127.0.0.1:22345 (The random port you selected before)
Enjoy
DevOps/IT Specialist, Musician.
IT Manager – Faculty of Exact Sciences, Bar-Ilan University
Personal Website
This article helped me in connecting to Remote Desktop. Thank you for your useful tutorial.