Tag Archives: CentOS 6.x

cento tomcat

CentOS Tomcat server installation is easy!

CentOS Tomcat installation

CentOS Tomcat

centos tomcat

“Apache Tomcat is an open source software implementation of the Java Servlet and JavaServer Pages technologies. The Java Servlet and JavaServer Pages specifications are developed under the Java Community Process.” from Tomcat homepage.


Prerequisities

  • CentOS 6.x (I haven’t tested this on older versions but it should probably work as well) 

Check your Java installation

before we’ll continue the installation of Tomcat, the JDK (Java Development Kit) should be installed on your CentOS machine. to check for Java support use the command:

java -version

javanotfound

if bash returns ‘command not found‘ then continue to the next step and install the JDK, else skip the step and continue to Tomcat server installation.


Install Java Development Kit (JDK)

To install the jdk we have 2 options:

  1. Install OpenJDK – Using YUM.
  2. Install Oracle JDK – Install manually.

I’ll explore both:

Option 1: Install Open-JDK using YUM

For beginners and testing purposes you should go with this option.

Why should I use the Oracle JDK over the OpenJDK, or vice-versa? [closed]

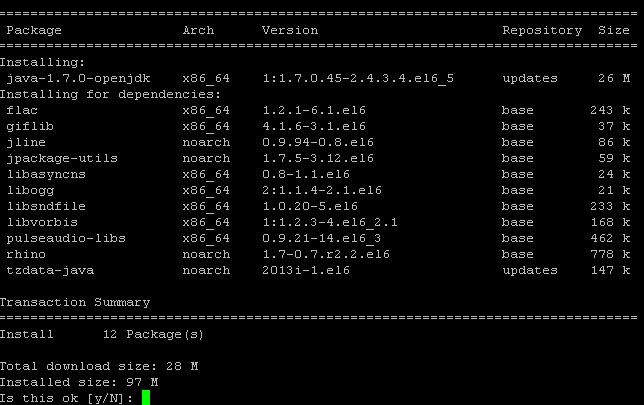
The command to install JDK using YUM is very simple:

yum install java

yuminstall java

  • Note: use sudo if you are not logged-in with root.
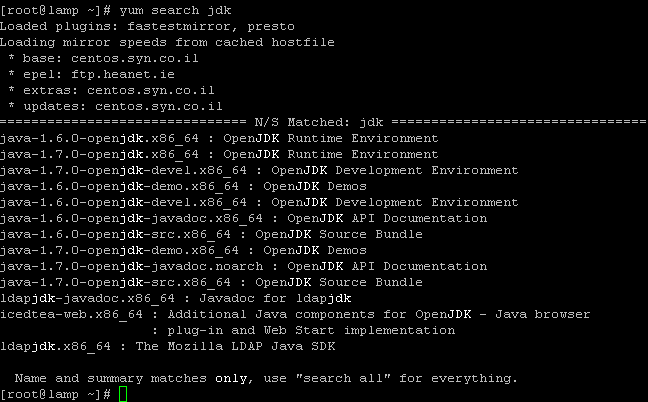
  • the command will install the latest jdk (1.7 as for this date). If you want to install older version use the full name (search using: $ yum search jdk)yum-search-jdk
    You can see you can install the 1.6 version by typing: yum install java-1.6.0

Check you have installed it right:

javafound


Option 2: Install JDK manually

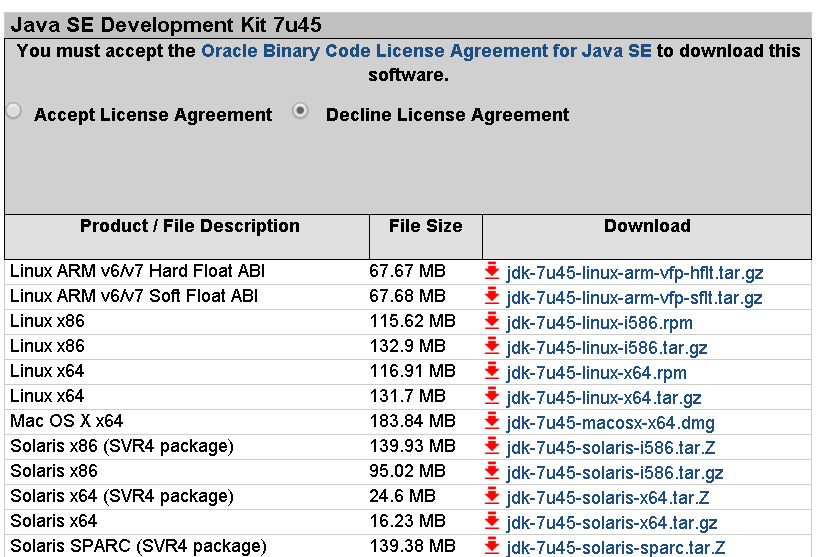
Download your required JDK here.

Note: I can’t give you an WGET command to download, because you need to Accept License Agreement before downloading any file.

You can download and install using the RPM or the tar.gz (both with x86 or x64) on your CentOS machine:

downloadjava


In case of our CentOS we can download and install the .rpm file or the .tar.gz file.

RPM can be installed ONLY by the root.
TAR.GZ can be installed be any user on the computer.


Option A: Install using .rpm

make sure to uninstall older installations (if any):

rpm –e <package name>

To install the jdk using the downloaded rpm use the rpm command:

rpm –ivh jdk-7u45-linux-x64.rpm

If you just want to upgrade a package you’ve already installed use the -Uvh parameter.

rpm –Uvh jdk-7u45-linux-x64.rpm

Delete the .rpm file if you want to save disk space.

Read more about installation of Oracle Java on Centos here on ItekBlog


Use alternatives :

alternatives –install /usr/bin/java java /usr/java/latest/jre/bin/java 20000
alternatives –install /usr/bin/javaws javaws /usr/java/latest/jre/bin/javaws 20000

alternatives

and config your default jdk (if you have more then one) using:

using:

alternatives –config java

alternatives-config


Test your environment

Just as in the first step: type java -version to see if your have jdk installed.

oraclejavaversion


Option B: Install using tar.gz

The advantage of tar.gz installation of the JDK is that we can able to install multiple version of java if required.

The archive can be installed by anyone (not only root users), in any location that you can write to. However, only the root user can install the JDK into the system location.

You need to unpack the .tar.gz file (using tar -xzf) into the  the location where you would like the JDK to be installed.

Unpack the tarball and install the jdk:

tar zxvf jdk-7u<version>-linux-i586.tar.gz

Delete the .tar.gz file if you want to save disk space.


Use alternatives :

alternatives –install /usr/bin/java java /path/to/jdk1.7.0_45/bin/java 2
alternatives –config java

read more about installation of jdk in the oracle documentation.

for extended installation tutorial read this post by adam in this blog.


JDK 1.6 vs JDK 1.7

read more on What is the difference between jdk 1.6 and 1.7 ?


Environment Variables

1
JAVA_HOME

 is a 

1
environment

 variable (in Unix terminologies), or a PATH variable (in Windows terminology) you need to create to point to where Java is installed. ($JAVA_HOME/bin/java should execute the Java runtime).

Why doesn’t the Java SDK installer set JAVA_HOME?

To set it for your current session type at bash:

export JAVA_HOME=/usr/java/jdk1.7.0_05
export PATH=$PATH:$JAVA_HOME/bin

To set the JAVA_HOME permanently we need to add the commands to the ~/.bash_profile file of the user.
We can also add it /etc/profile and then source it to give to all users.


Test Environment Variables

use the echo command to check you’ve configured the variables:

echo $JAVA_HOME
echo $PATH

echovars


Installing Tomcat

After we have java installed and tested we can continue to the installation of the Tomcat server.

Download Tomcat

Since Apache Tomcat is distributed as binaries, all you have to do is to download it and start it.

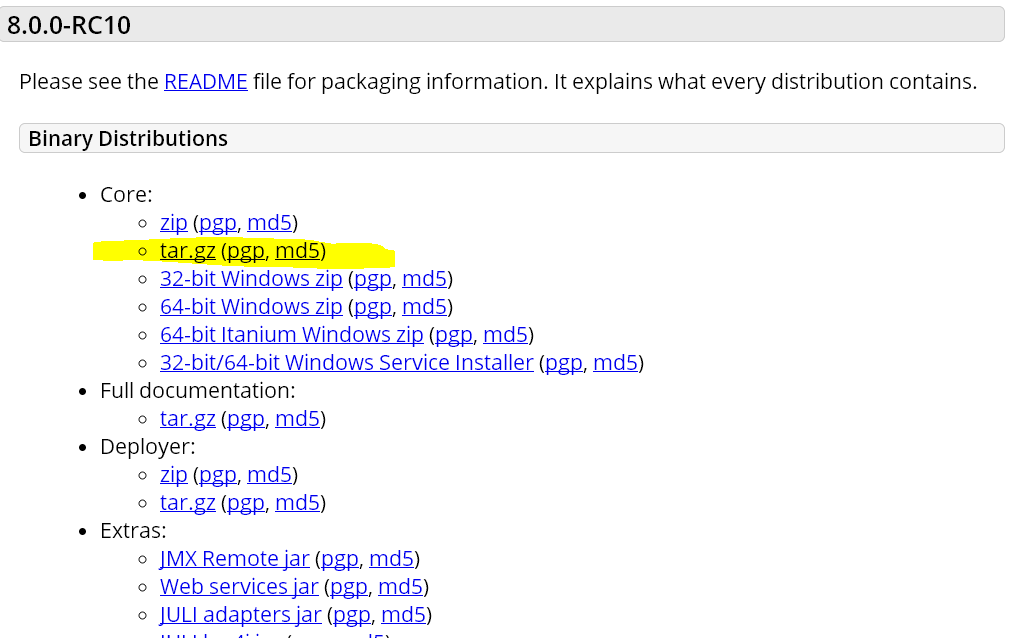
Download apache-tomcat-x.x.xx.tar.gz (latest version or any) from Apache Tomcat Homepage

I’ll go with the tomcat 8 – tar.gz package.

centos tomcat

centos tomcat

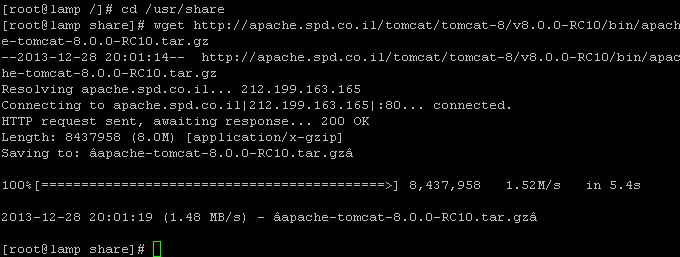
and using command:

cd /usr/share
wget http://apache.spd.co.il/tomcat/tomcat-8/v8.0.0-RC10/bin/apache-tomcat-8.0.0-RC10.tar.gz

tomcat-wget

verify and extract the download using::

md5sum apache-tomcat-8.0.0-RC10.tar.gz
tar xvzf apache-tomcat-8.0.0-RC10.tar.gz

and I have a /usr/share/apache-tomcat-8.0.0-RC10 folder now.


Test Tomcat server

Tomcat by default start on port 8080 you can start the server now by typing at bash:

cd apache-tomcat-8.0.0-RC10
./bin/startup.sh

tomcat-start


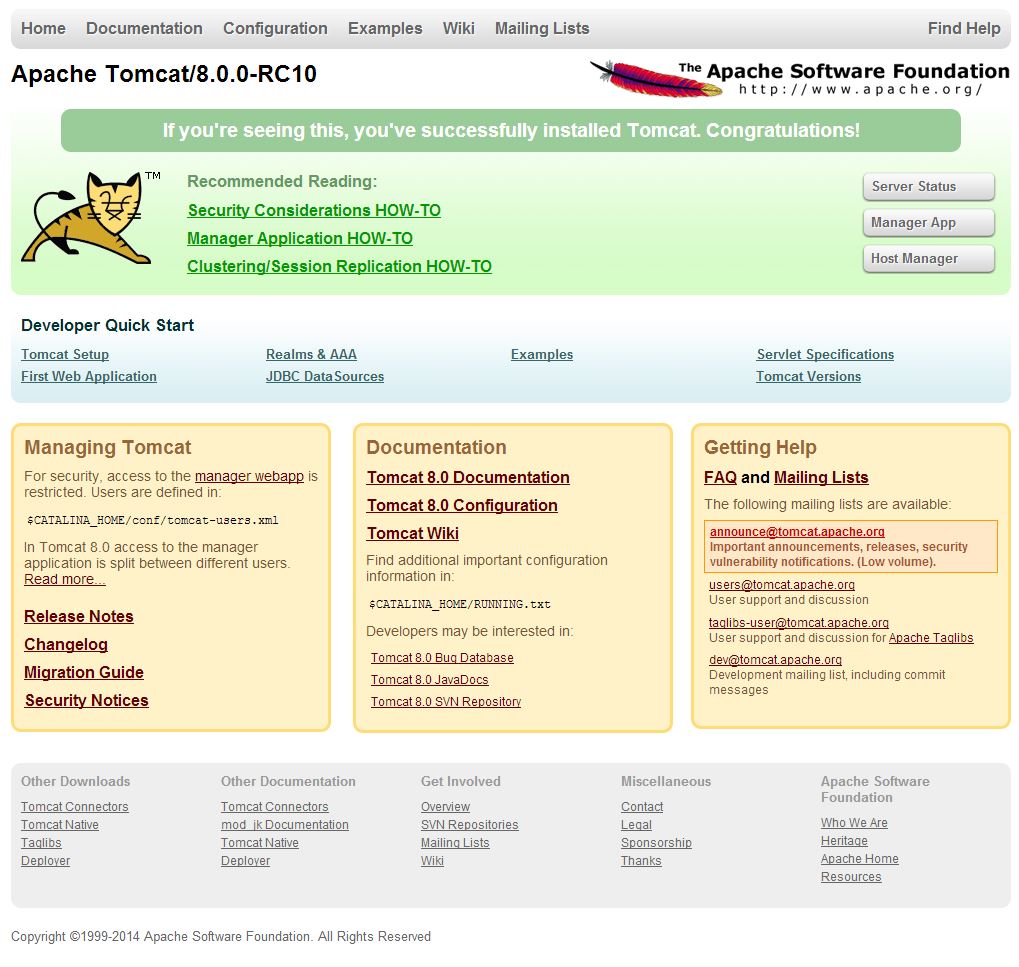
Now Access the tomcat by connecting your server with a web browser on port 8080.

http://localhost:8080

tomcat

If you cannot access the above Tomcat page, make sure to stop iptables (since CentOS has iptables on by default set to block the Tomcat’s default listening port 8080).

service iptables stop

to permanently disable iptables (NOT RECOMMENDED AT ALL) use:

chkconfig iptables off

Change the Tomcat server port

Locate server.xml in {Tomcat installation folder}/conf/ which is at /usr/share/apache-tomcat-8.0.0-RC10/conf in our case

Find the following:

 <!-- Define a non-SSL HTTP/1.1 Connector on port 8180 -->
    <Connector port="8080" maxHttpHeaderSize="8192"
               maxThreads="150" minSpareThreads="25" maxSpareThreads="75"
               enableLookups="false" redirectPort="8443" acceptCount="100"
               connectionTimeout="20000" disableUploadTimeout="true" />

and change the 8080 port to your required port.


Start on boot

To start the tomcat service on system boot create the file /etc/init.d/tomcat8 (I am using vi /etc/init.d/tomcat8) and fill it with:

#!/bin/bash 
# description: Tomcat Start Stop Restart 
# processname: tomcat 
# chkconfig: 234 20 80 
JAVA_HOME=/usr/java/jdk1.7.0_05 
export JAVA_HOME 
PATH=$JAVA_HOME/bin:$PATH 
export PATH 
CATALINA_HOME=/usr/share/apache-tomcat-8.0.0-RC10
 
case $1 in 
start) 
sh $CATALINA_HOME/bin/startup.sh 
;; 
stop) 
sh $CATALINA_HOME/bin/shutdown.sh 
;; 
restart) 
sh $CATALINA_HOME/bin/shutdown.sh 
sh $CATALINA_HOME/bin/startup.sh 
;; 
esac 
exit 0

Now set the permissions on the file and the catalina.sh file:

chmod a+x /etc/init.d/tomcat8
chmod a+x /usr/share/apache-tomcat-8.0.0-RC10/bin/catalina.sh

to start/stop/restart the service use:

service tomcat8 start
service tomcat8 restart
service tomcat8 stop

to start the service on boot use:

chkconfig --add tomcat8
chkconfig tomcat8 on

to disable it later you can use off instead of on:

chkconfig tomcat8 off


That’s it! you have your CentOS Tomcat server working and runing… 

G-WAN

CentOS G-WAN server installation instructions

CentOS G-WAN Server

CentOS G-WAN server

G-WAN is a web server with scripts in Asm, C, C++, C#, D, Go, Java, Javascript, Lua, Objective-C, Perl, PHP, Python, Ruby and Scala.

G-WAN better uses CPU Cores
to make the Internet of Things
fly thousand times higher !

Leverage legacy servers and
low-consumption CPUs to
do more with less!

G-WAN works best on Linux distributions like Debian or CentOS, both of which offer ‘Desktop’ and ‘Server’ flavors.


CentOS G-WAN server installation instructions

CentOS G-WAN installation instructions


Installation

choose a location for your installation. for demonstration purposes we’ll install G-WAN to /opt

cd /opt
wget http://gwan.com/archives/gwan_linux64-bit.tar.bz2
tar -xjf gwan_linux64-bit.tar.bz2; cd gwan_linux64-bit
sudo ./gwan
centos g-wan

centos g-wan

use the 32bit version instead (http://gwan.com/archives/gwan_linux32-bit.tar.bz2) if you need.

Test

Then, type http://localhost:8080/ in your browser

centos g-wan

centos g-wan server default homepage

and play with the/gwan/.../csp samples.


Programming Languages

If you want to install more Programming Languages read the FAQ – Setup of Programming Languages

To install all 15 languages using the bash script donated by generous user on many Linux distributions (Debian, LinuxMint, CentOS, Fedora, RedHat, Manjaro, Arch Linux and Bridge) use:

cd /opt
wget http://www.as2.com/linux/tools/G-WAN_full-install.tar.bz2
tar -xjf G-WAN_full-install.tar.bz2
./G-WAN_full-install

The installation menu is available in English, German, French and Spanish!


Service mode

To start G-WAN as a service (make it start automatically at boot time) use this instructions

with one exception for CentOS in the manual:

instead of:

sudo update-rc.d gwan defaults 95 5

use:

sudo chkconfig gwan on

and you don’t need to restart.


What’s next?

check the API and Frequently Asked Questions.

Stackoverflow lists many more examples and will let you search for replies to common questions.


And that’s it. you have G-WAN server.

VMWare Workstation start on boot CentOS

VMWare Workstation start on boot CentOS

vmware workstation start on boot centos

If you are like me, using VMWare workstation on Linux (CentOS 6.4), and you want to start your virtual machines on boot, I have the answer.

Prerequisities

  • CentOS 6.x. – although the vmrun command may be working in other distributions too.
  • VMWare Workstation 4.0+


 VMWare Workstation start on boot CentOS

VMWare Workstation start on boot CentOS


The Solution

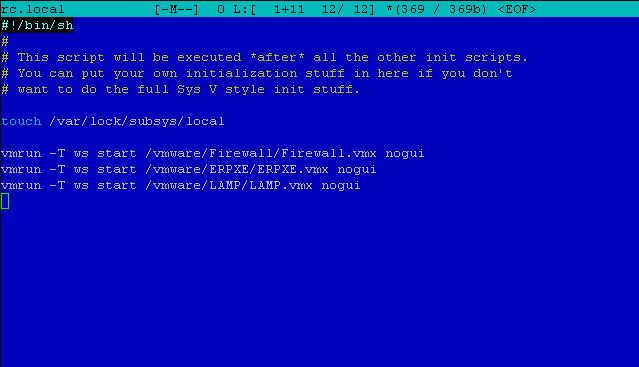
Edit rc.local

add to the end of the following file:

/etc/rc.d/rc.local

the following:

vmrun -T ws start /path/to/machine.vmx nogui

create new line for each machine you want to start on boot.


that’s it! that how you run vmware workstation start on boot centos


That’s it.

Setup BIND DNS Server on CentOS 7

VMware Tools CentOS 6.x easy installation guide.

VMware Tools CentOS 6.x easy installation guide.

Prerequisities

if you have installed new setup of centos or you haven’t installed yet, you need make, gcc, kernel-devel..

Continue reading

VMWare Workstation start on boot CentOS

CentOS RPMForge Installation Instructions (for Centos 6.x)

CentOS RPMForge Installation Instructions (for Centos 6.x)

Overview

If you want to add the RPMForge repo to your CentOS, use the following instructions


Downloading RPMForge repo

cd /tmp
# for 32 bit:
wget http://pkgs.repoforge.org/rpmforge-release/rpmforge-release-0.5.3-1.el6.rf.i686.rpm
# for 64 bit:
wget http://pkgs.repoforge.org/rpmforge-release/rpmforge-release-0.5.3-1.el6.rf.x86_64.rpm

Note: Visit here to see if newer version exist.

Installing RPMForge

rpm –import http://apt.sw.be/RPM-GPG-KEY.dag.txt

# for 32 bit:
rpm -i rpmforge-release-0.5.3-1.el6.rf.i686.rpm
# for 64 bit:
rpm -i rpmforge-release-0.5.3-1.el6.rf.x86_64.rpm

yum clean all

Open Extra Repo

If you want, you can enable the extra repo using:

cd /etc/yum.repos.d

edit using vi/vom/mc rpmforge.repo:
change the enabled flag to enabled=1 in the section [rpmforge-extras].


Update all

yum update


That’s it!

VMWare Workstation start on boot CentOS

Update Git CentOS – to version 1.7.11+ (on CentOS 6.x)

Update Git Centos – to version 1.7.11+ (on CentOS 6.x)

Overview

If you want to update your Git to newer version then on CentOS repository, use the following instructions


Downloading RPMForge repo

cd /tmp
# for 32 bit:
wget http://pkgs.repoforge.org/rpmforge-release/rpmforge-release-0.5.3-1.el6.rf.i686.rpm
# for 64 bit:
wget http://pkgs.repoforge.org/rpmforge-release/rpmforge-release-0.5.3-1.el6.rf.x86_64.rpm

Note: Visit here to see if newer version exist.

Installing RPMForge

rpm –import http://apt.sw.be/RPM-GPG-KEY.dag.txt
# for 32 bit:
rpm -i rpmforge-release-0.5.3-1.el6.rf.i686.rpm
# for 64 bit:
rpm -i rpmforge-release-0.5.3-1.el6.rf.x86_64.rpm

Open Extra Repo

yum clean all

cd /etc/yum.repos.d

edit using vi/vom/mc rpmforge.repo:
change the enabled flag to enabled=1 in the section [rpmforge-extras].


Update Git

yum update git

yum provides git will help you see all versions available.

git –version

Will show you have the new release installed. (1.7.11.3 for me)


That’s it!

Python vs PyPy installation and comparison (on Centos 6.x)

Python vs PyPy

in this article: Python vs PyPy I’ll explain how-to install both compilers (Python (CPython) and PyPy) on CentOS and the difference between them.

Requirements for examples:

  • Centos 6.x


Overview

The Download section of the Python official website (python.org) include list of several Alternative Implementations for python complier. some of them for Linux, some for Windows (.NET) and others.

I am going to review the default Python compiler vs PyPy on my CentOS 6.x machine.


python-logo

Python (nicknamed CPython)

Installation

yum install python

From Official website:

Python is a programming language that lets you work more quickly and integrate your systems more effectively. You can learn to use Python and see almost immediate gains in productivity and lower maintenance costs.

Python (nicknamed CPython) is the default Python Compiler you get with you installing Python.

Example

Create a file named ‘example.py‘ and fill it with:

print 'Hello, world!'

and type on bash:

python example.py

Note: you can also insert the following line as the first line in your .py file and then chmod +x this file to execute it as script:

#!/usr/lib/env python
print “Hello, world!”

and then on bash:

chmod +x example.py

and you can run the script (code) using:

./example.py


pypy-logo

PyPy

fast python implementation with a JIT compiler (generate native code on the fly) written in RPython and currently translated partly to C.
Arguments against PyPy compiled in Python are everywhere, but when C compiler gcc is implemented in C, is there any reason for the Python compiler to not be written in Python?

From Wikipedia:

PyPy is a Python interpreter and just-in-time compiler. PyPy focuses on speed, efficiency and compatibility with the original CPython interpreter.[1]

PyPy started out as a Python interpreter written in the Python language itself. Current PyPy versions are translated from RPython to C code and compiled. The PyPy JIT compiler is capable of turning Python code into machine code at run time.


Mission

The mission of PyPy is:

We aim to provide:

  • a common translation and support framework for producing implementations of dynamic languages, emphasizing a clean separation between language specification and implementation aspects. We call this the RPython toolchain.
  • a compliant, flexible and fast implementation of the Python Language which uses the above toolchain to enable new advanced high-level features without having to encode the low-level details. We call this PyPy.

By separating concerns in this way, our implementation of Python – and other dynamic languages – is able to automatically generate a Just-in-Time compiler for any dynamic language. It also allows a mix-and-match approach to implementation decisions, including many that have historically been outside of a user’s control, such as target platform, memory and threading models, garbage collection strategies, and optimizations applied, including whether or not to have a JIT in the first place.


How can it possibly beat CPython?

Manual memory management (which is what CPython does with its counting) can be slower than automatic management in some cases.

Limitations in the implementation of the CPython interpreter preclude certain optimisations that PyPy can do (eg. fine grained locks).

The JIT. Being able to on the fly confirm the type of an object can save you the need to do multiple pointer dereferences to finally arrive at the method you want to call.


Installation

yum install pypy


Using PyPy

To use pypy instead of your default CPython compiler you need to run your .py file with the pypy compiler.

to use pypy compiler you type at bash:

and type on bash:

pypy myapp.py


Summary

Python compiler (CPython) is the default and probably the safe choice so most python applications and modules will work; where PyPy can break some.

You should play with them both. Install them both on your CentOS and test / benchmark your applications using both compilers.

PyPy can rebust your web applcations (or any other code).

For example, Django app can be run on top of PyPy, with drawbacks.


Read more…

gevent CentOS 6.x Installation Guide

gevent CentOS 6.x Installation Guide

gevent CentOS 6.x Installation Guide

Installation

Requirments

  • yum install python python-devel
  • yum install libevent-devel


Install Setuptools

install python-setuptools (for easy_install)

yum install python-setuptools

Install greenlet

Install greenlet:

easy_install greenlet

Install gevent

There are several ways to install gevent:

using easy_install (recommended)

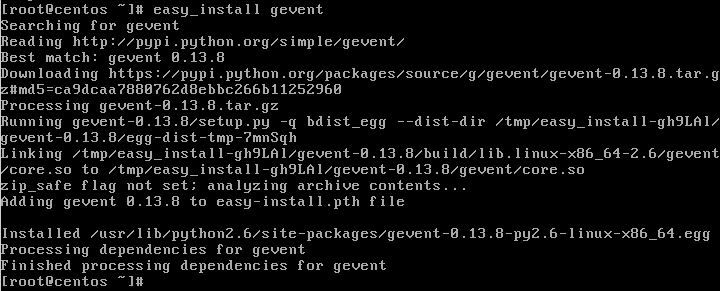
easy as:

easy_install gevent

centos gevent

from source

You need wget to download source:

yum install wget

Now, installing gevent: (Check here for the latest package)

cd /tmp wget http://pypi.python.org/packages/source/g/gevent/gevent-0.13.8.tar.gz tar -xvzf gevent-0.13.8.tar.gz cd gevent-0.13.8 python setup.py install

U may need to add –no-check-certificate to the wget if something is wrong.

from GitHub

You can also install gevent from github using pip.

Test

to test simply run in bash:

python

and then:

import gevent

if no error found, you have installed it correctly python-import-gevent

First App

Example taken from the community documentation:

1
2
3
4
5
6
7
8
9
10
11
12
13
14
from gevent.wsgi import WSGIServer
 
def application(environ, start_response):
    status = '200 OK'
    body = '<p>Hello World</p>'
 
    headers = [
        ('Content-Type', 'text/html')
    ]
 
    start_response(status, headers)
    return [body]
 
WSGIServer(('', 8000), application).serve_forever()
from gevent.wsgi import WSGIServer

def application(environ, start_response):
    status = '200 OK'
    body = '<p>Hello World</p>'

    headers = [
        ('Content-Type', 'text/html')
    ]

    start_response(status, headers)
    return [body]

WSGIServer(('', 8000), application).serve_forever()

copy the example into a file (server.py for ex), and start the server by:

python server.py

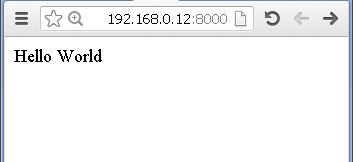
and that’s it! browse to the machine on port 8000 using something like this:

http://[ip of the machine]:8000

gevent-working

What’s next..?


Production

In production you can host your gevent after several WSGI server racks like: Gunicorn, Circus, Meinheld, uWSGI, etc..

Gunicorn is the most common WSGI server to host gevent applications. one benchmark shows that Circus is faster then Gunicorn. other tested uWSGI vs Gunicorn and found that uWSGI is faster.

recommend you run them behind a reverse proxy such as nginx. Additional advantages of running them behind a reverse proxy include improved handling of slow clients and bad HTTP requests


SocketIO

You need socketio? you may want to install it:

easy_install gevent-socketio


Read more…


need microframework? (flask/bottle)?

You can use a python web framework on top of gevent.


CentOS Tornado server installation tutorial

Centos Tornado Server Installation Tutorial


Install using repository

yum install python-tornado


First ‘Hello World’ App

I’ve copied the hello world sample from Tornado documentation:

Create a new file called ‘hello.py‘ (or any other name) and fill it with:

1
2
3
4
5
6
7
8
9
10
11
12
13
import tornado.ioloop
import tornado.web
class MainHandler(tornado.web.RequestHandler):
   def get(self):
      self.write("Hello, world")
 
application = tornado.web.Application([
   (r"/", MainHandler),
])
 
if __name__ == "__main__":
   application.listen(8888)
   tornado.ioloop.IOLoop.instance().start()
import tornado.ioloop
import tornado.web
class MainHandler(tornado.web.RequestHandler):
   def get(self):
      self.write("Hello, world")

application = tornado.web.Application([
   (r"/", MainHandler),
])

if __name__ == "__main__":
   application.listen(8888)
   tornado.ioloop.IOLoop.instance().start()

Now start your server with simply typing at bash:

1
python hello.py
python hello.py

Now you can visit ‘127.0.0.1:8888‘ to watch your hello world first torando app.

It should return the ‘Hello, world‘ output into your browser.


Nginx

Good implementation of your server would be behind nginx server, where you can run multiple instances of your app on different port and serve them all throw port 80 using nginx load balancer.

http://www.tornadoweb.org/en/latest/overview.html#running-tornado-in-production


After you know how to start a torando server, you can jump into the documentation and learn how-to build your first Torando server!


OpenVPN ALS Adito SSL VPN Gateway on CentOS

Overview

OpenVPN ALS Adito SSL VPN Gateway is a web-based SSL-VPN server written in Java and it is completely free and open-source.
The installation on CentOS 6 Linux Operating System is fairly simple using the next few steps (we will use CentOS Minimal x86_64).
Continue reading

VMware Zimbra Active Directory User Mailbox Sync

Overview

Zimbra Active Directory User Mailbox Sync script uses Zimbra utility to Add or Remove mailboxes according to the AD User List.
You can sync all AD users at once or Create a Security Group And add members in order to assign a mailbox.
Continue reading

sSMTP a Gmail sendmail relay replacement for Linux

Overview

sSMTP – a simple and lightweight MTA used to deliver mail from a computer to a mail hub (SMTP server) using Gmail SMTP servers.
Unlike Exim4, it does not receive mail, expand aliases, or manage a queue.

Continue reading